
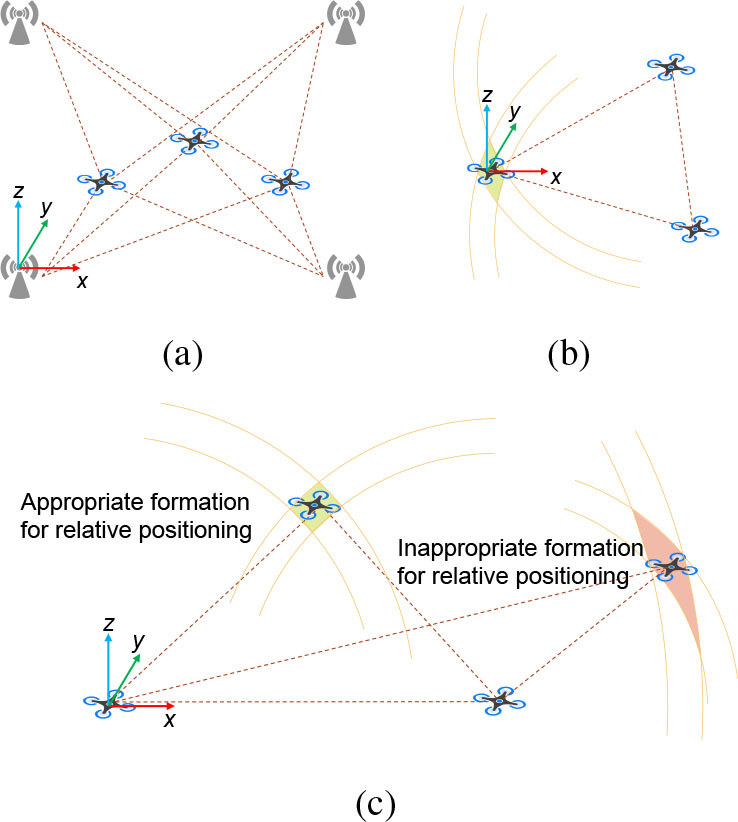
Fig. 1.
Schematic diagram of relative positioning for UAV swarm. (a) Positioning based on external anchors. (b) Anchor-free relative positioning. (c) The influence of formation on positioning accuracy.
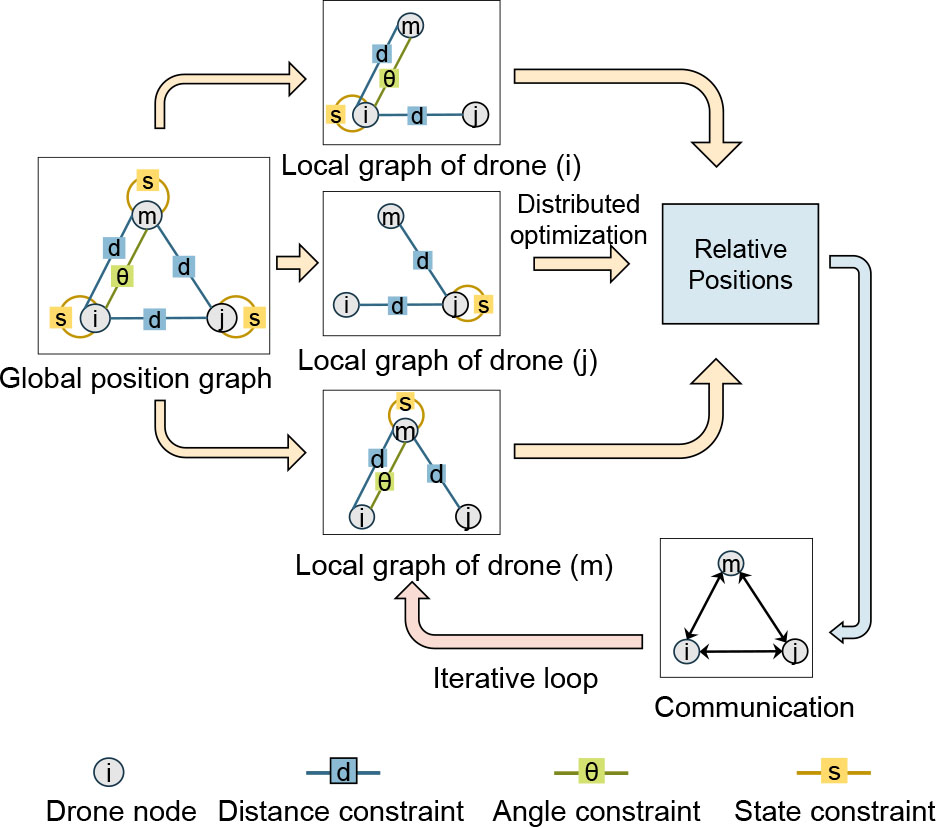
Fig. 2.
The DGO scheme for UAV swarm.
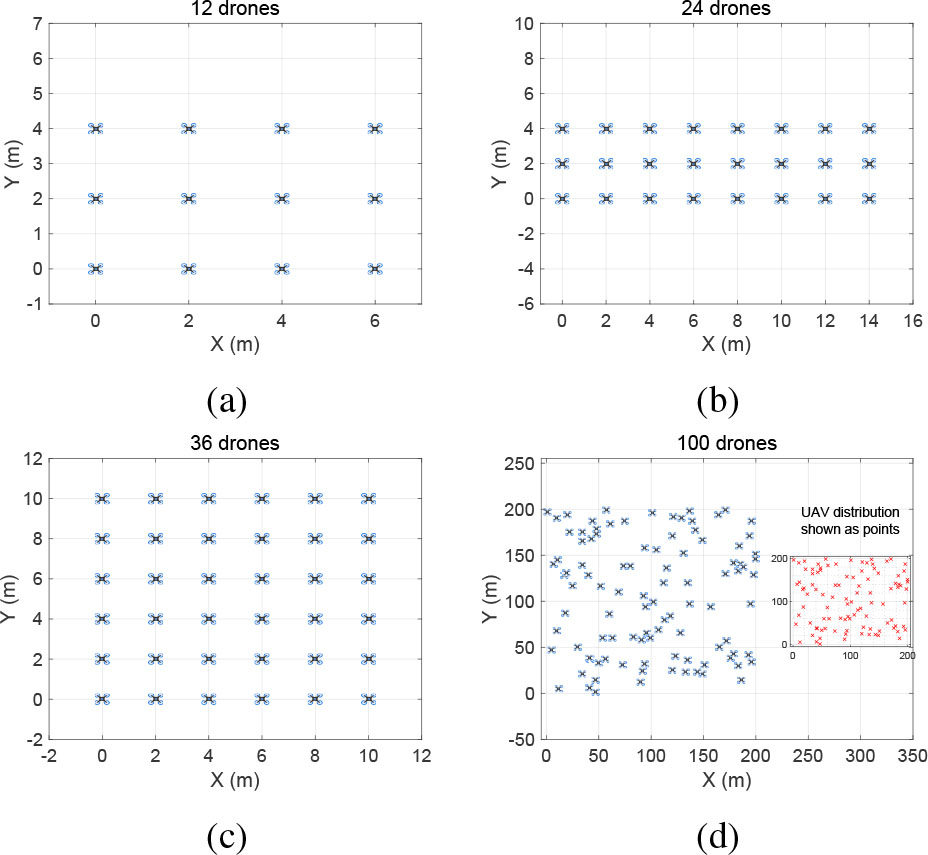
Fig. 3.
UAV swarms used in the simulations. (a) 12-UAV swarm. (b) 24-UAV swarm. (c) 36-UAV swarm. (d) 100-UAV swarm.
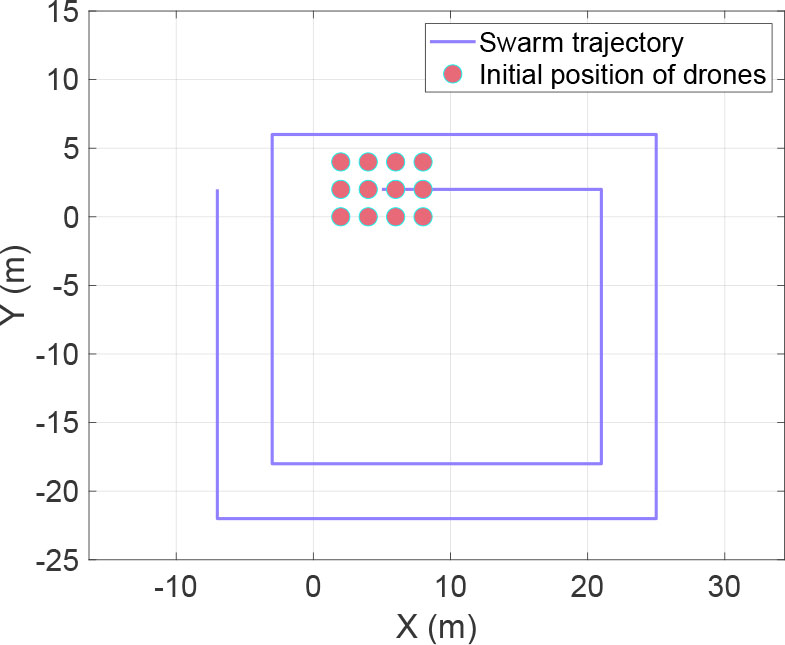
Fig. 4.
The flight trajectory of the swarm.
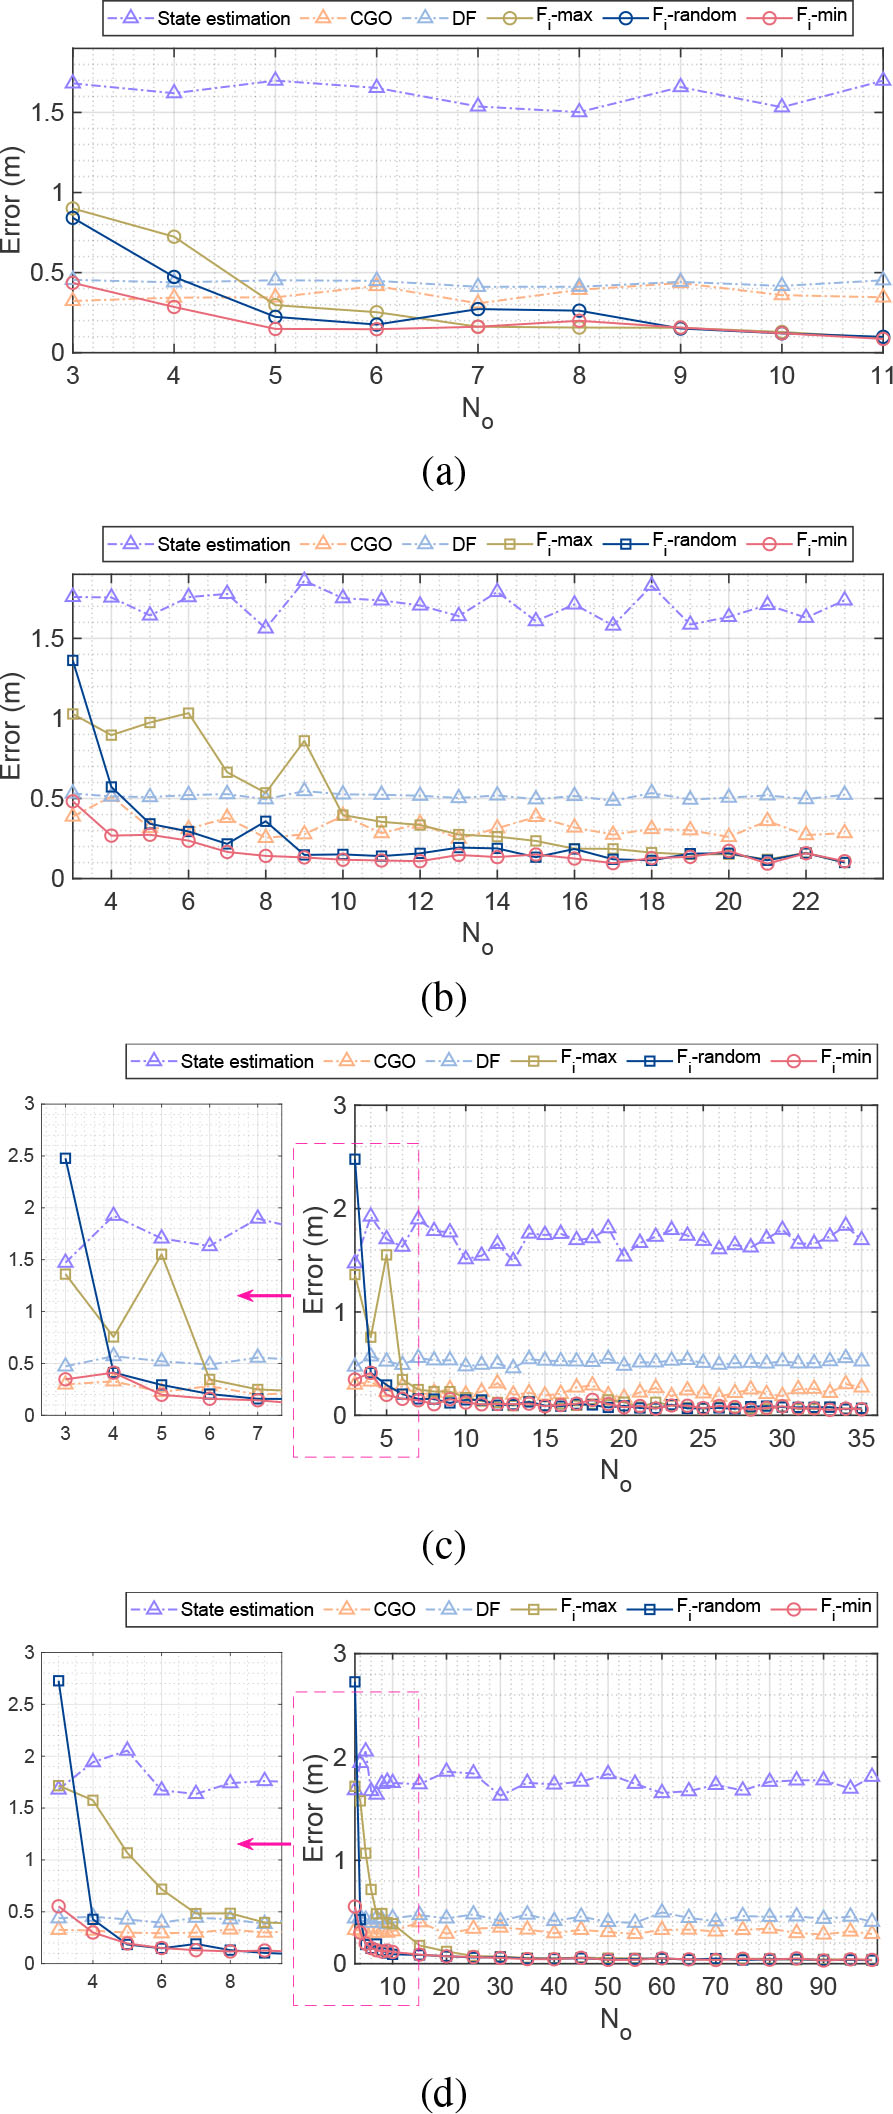
Fig. 5.
Relative positioning error variations with respect to No across four methods. (a) Error curves for the 12-UAV swarm. (b) Error curves for the 24-UAV swarm. (c) Error curves for the 36-UAV swarm. (d) Error curves for the 100-UAV swarm.
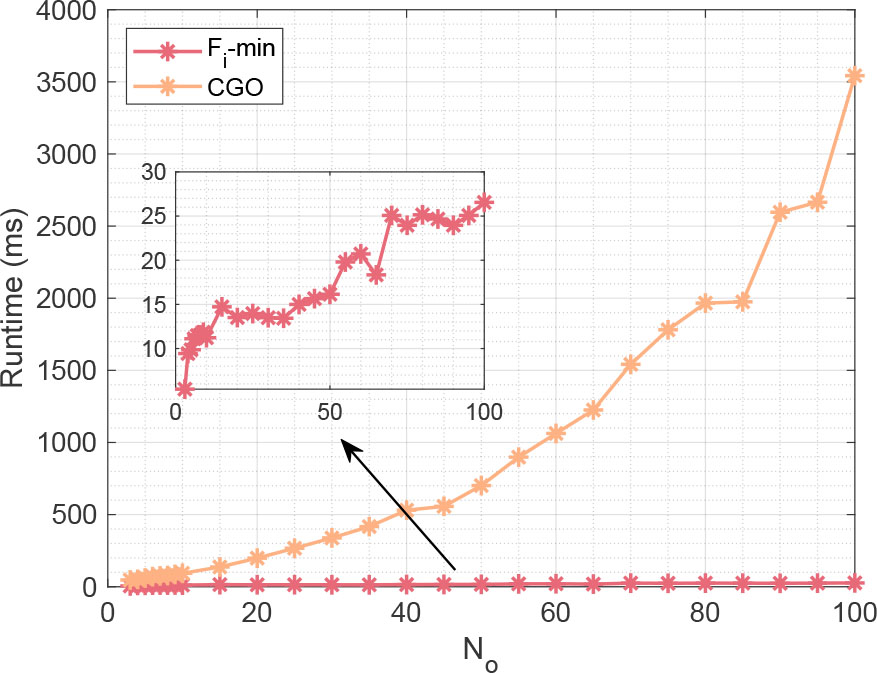
Fig. 6.
The variation of computation time per step with No.
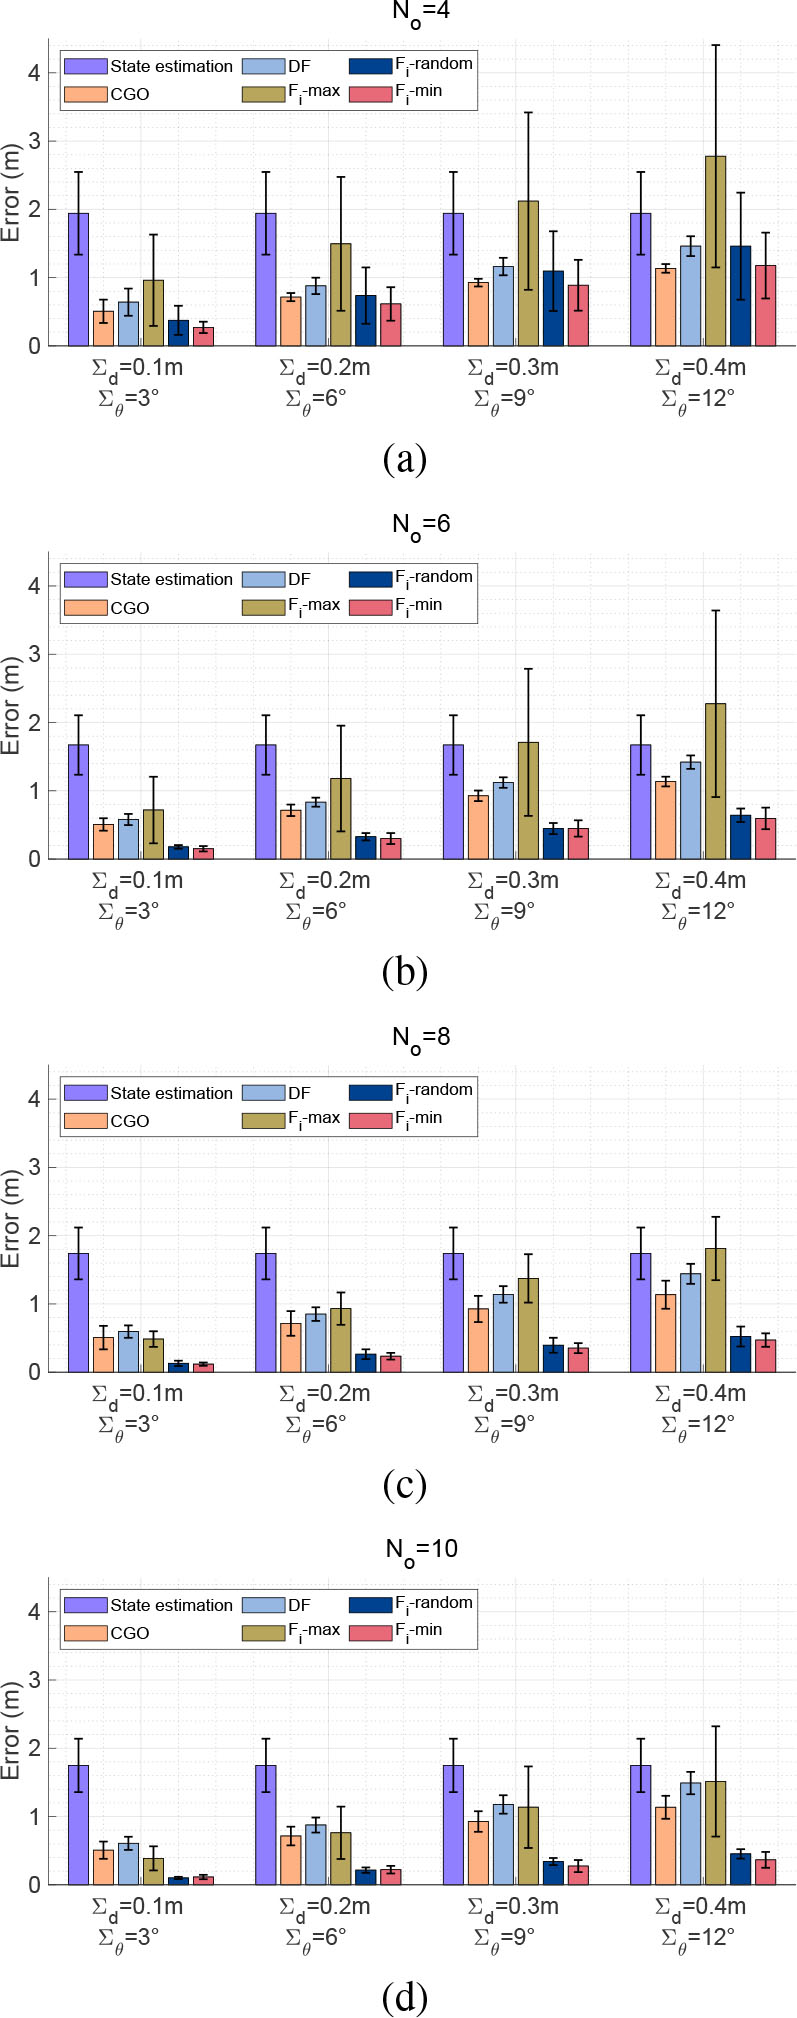
Fig. 7.
Relative positioning error for four methods in the 100-UAV swarm under different sensing conditions. (a) No = 4. (b) No = 6. (c) No = 8. (d) No = 10.
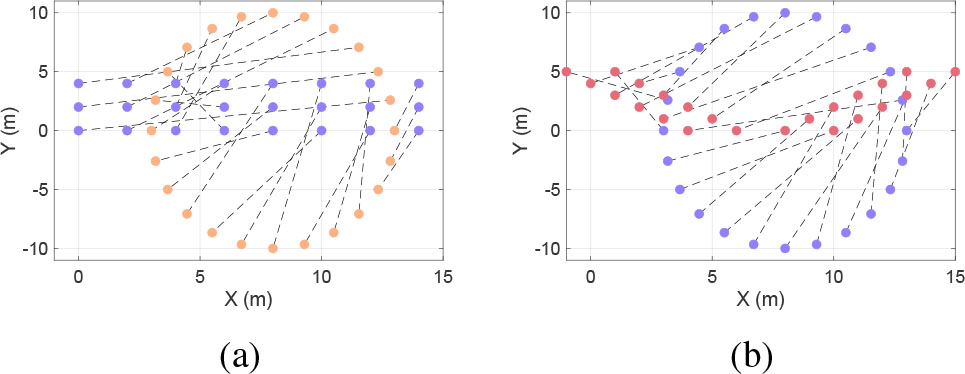
Fig. 8.
Dynamic formation reconfiguration. (a) Transformation from rectangle formation to circular formation. (b) Transformation from circular formation to V-formation.
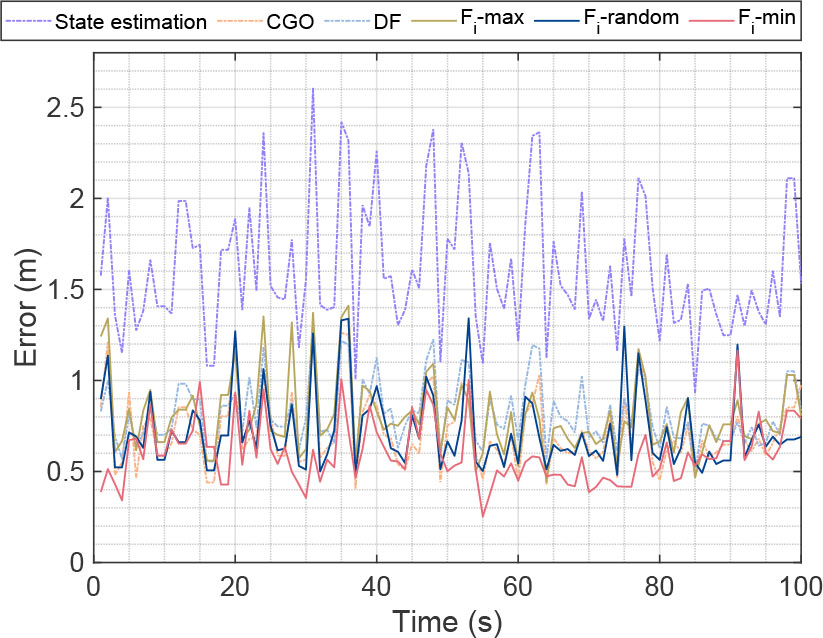
Fig. 9.
Error curves in topology reconfiguration simulation.