

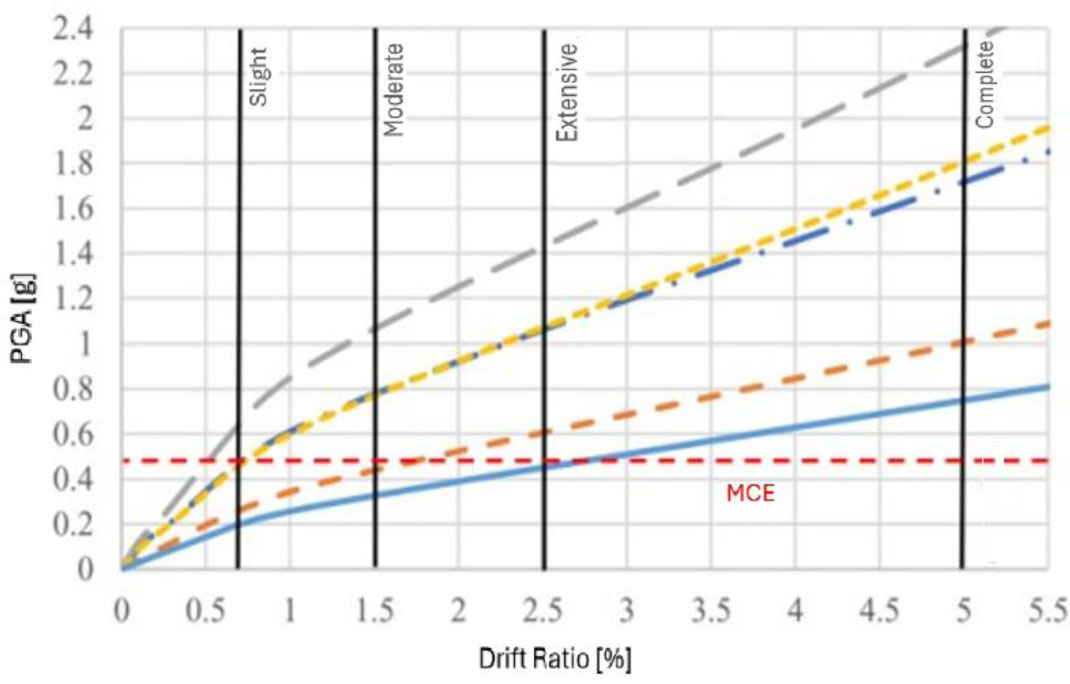
Figure 1:
Example of IDA curve for pier under different earthquakes (Htay et al., 2025)
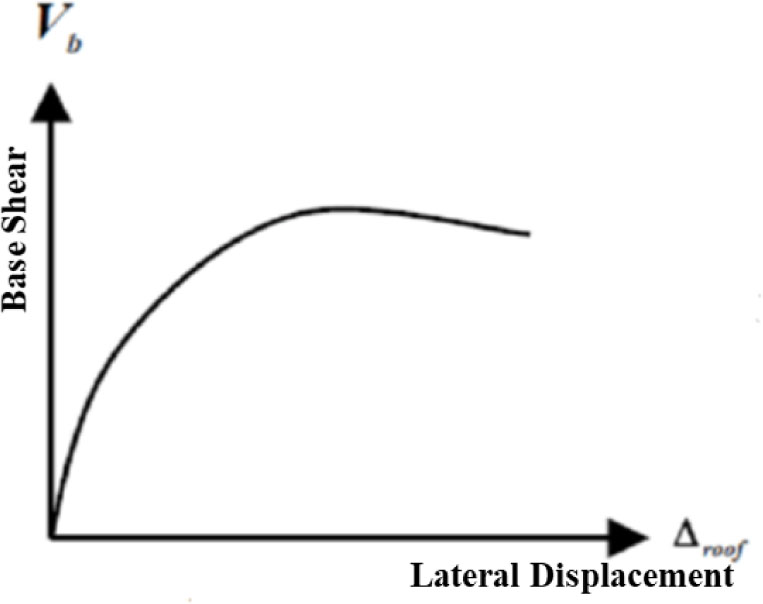
Figure 2:
Examples of Capacity Curve (Farhan, 2020)
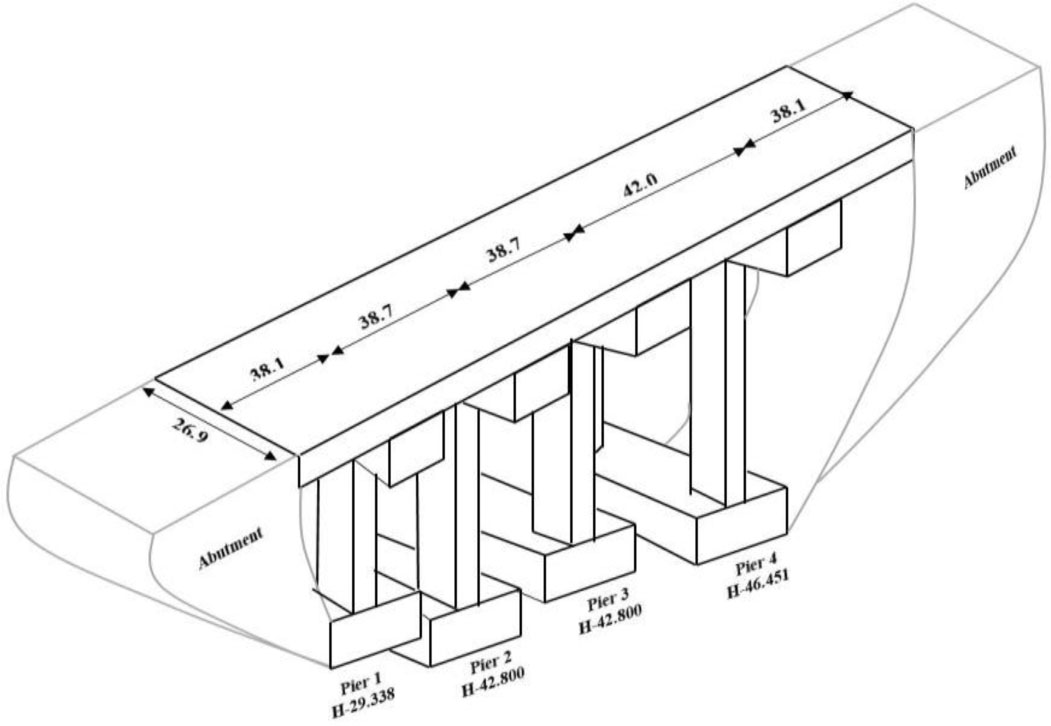
Figure 3:
Multi-Span Reinforced Concrete Bridge (Unit in meter)
Table 1:
Bridge Pier Configurations
| Pier | Height [m] | Pier cross-sectional dimensions [m] | Longitudinal reinforcement | Transverse reinforcement | ||||||
|---|---|---|---|---|---|---|---|---|---|---|
| Section | b | h | t | Main | Stirrup | |||||
| Pier1 | P1a | P1b | 29.338 | Rectangular Hollow | 3.1 | 3.6 | 0.5 | 140D22 | D16-100 | D13-250 |
| Pier 2 | P2a | P2b | 42.810 | Rectangular Hollow | 3.1 | 3.6 | 0.5 | 112D22 | D16-100 | D13-250 |
| Pier 3 | P3a | P3b | 42.810 | Rectangular Hollow | 3.1 | 3.6 | 0.5 | 112D22 | D16-100 | D13-250 |
| Pier 4 | P4a | P4b | 46.451 | Rectangular Hollow | 3.1 | 3.6 | 0.5 | 100D13 | D16-100 | D16-250 |
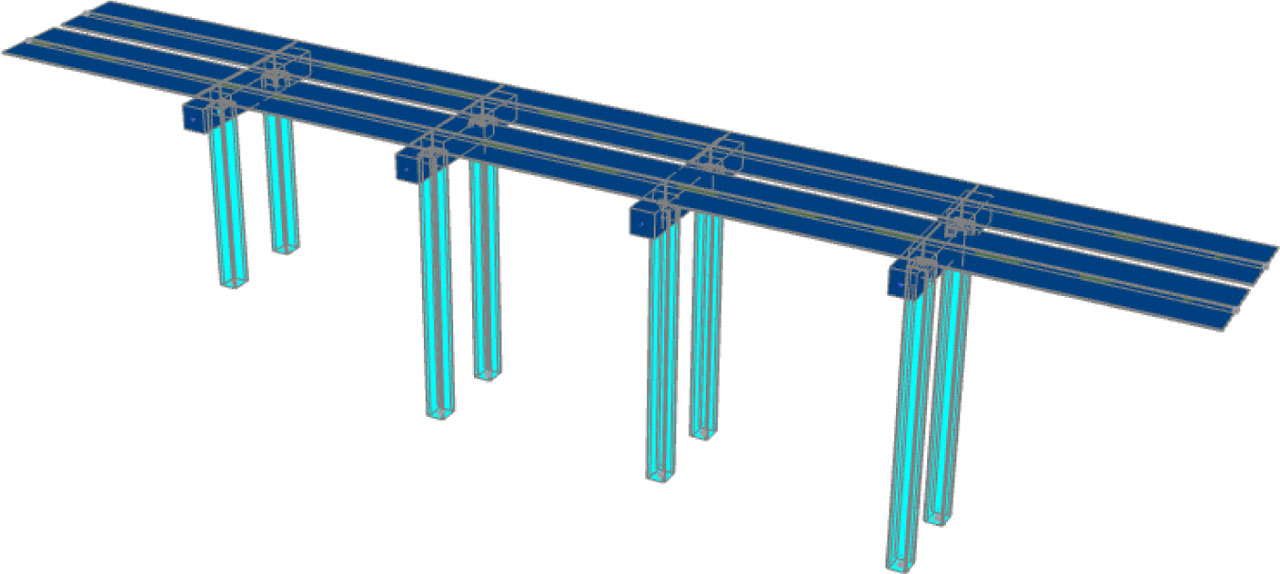
Figure 4:
Multi-span reinforced concrete bridge modeling by SeismoStruct 2022 (Seismosoft Earthquake Engineering Software Solutions, n.d.)
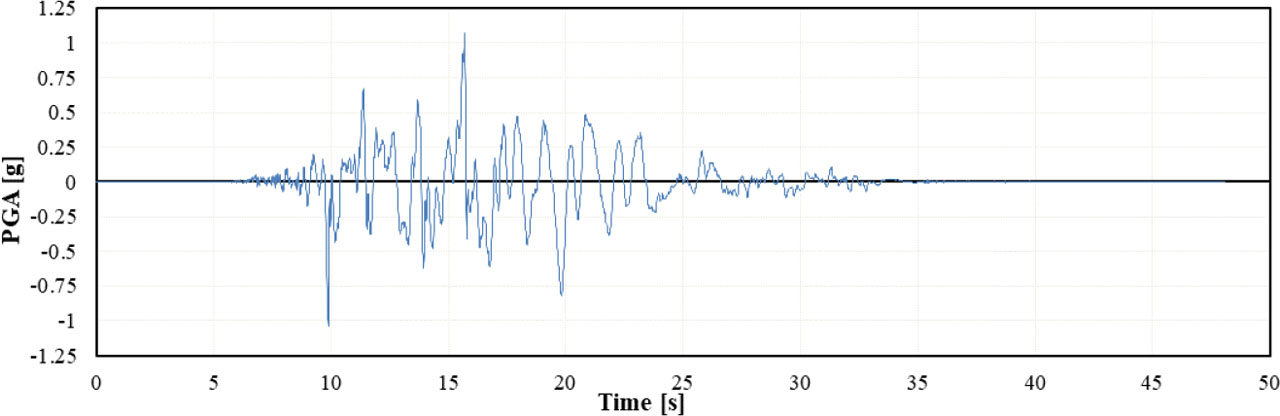
Figure 5:
Sagaing City Time History Curve
Table 2:
Earthquakes Used in Incremental Dynamic Analysis
| No. | Year | Name of Earthquake | Magnitude, [Mw] | Joyner-Boore distance, Rjb [km] | Damping [%] |
|---|---|---|---|---|---|
| 1 | 1966 | Parkfield | 6.19 | 17.64 | 5 |
| 2 | 1989 | Loma Prieta | 6.93 | 11.03 | 5 |
| 3 | 1992 | Big Bear | 6.46 | 7.31 | 5 |
| 4 | 1994 | Northridge-01 | 6.69 | 12.39 | 5 |
| 5 | 1995 | Kobe, Japan | 6.9 | 11.34 | 5 |
| 6 | 1999 | Duzce Turkey | 7.14 | 9.14 | 5 |
| 7 | 2008 | Iwate Japan | 6.9 | 11.68 | 5 |
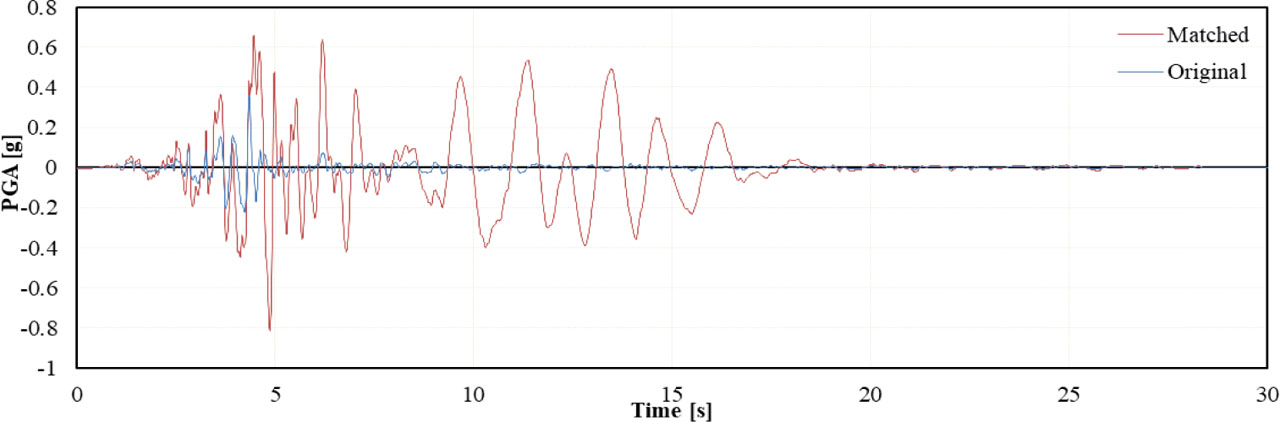
Figure 6:
Comparison of time history curves with Sagaing City and Parkfield Earthquake
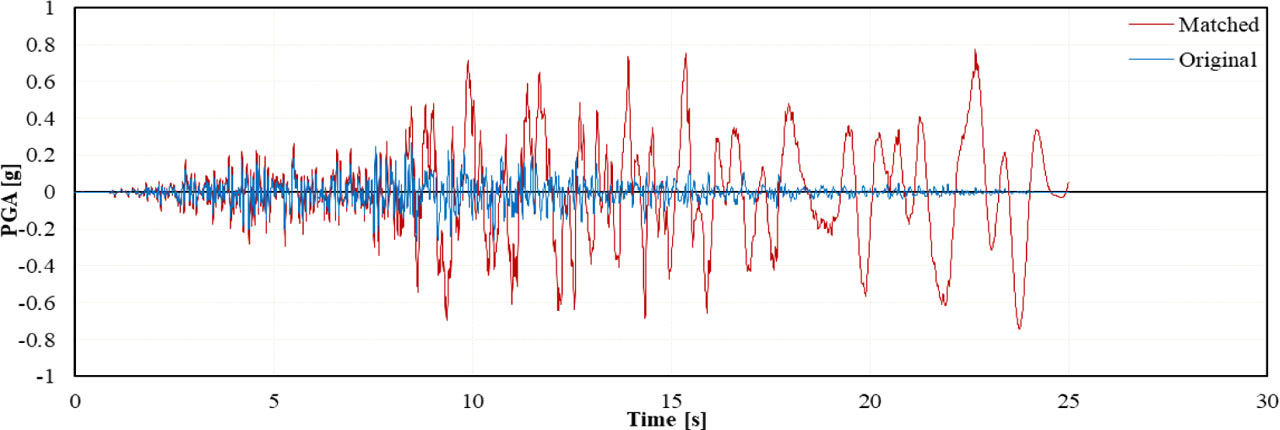
Figure 8:
Comparison of time history curves with Sagaing City and Loma Prieta Earthquake
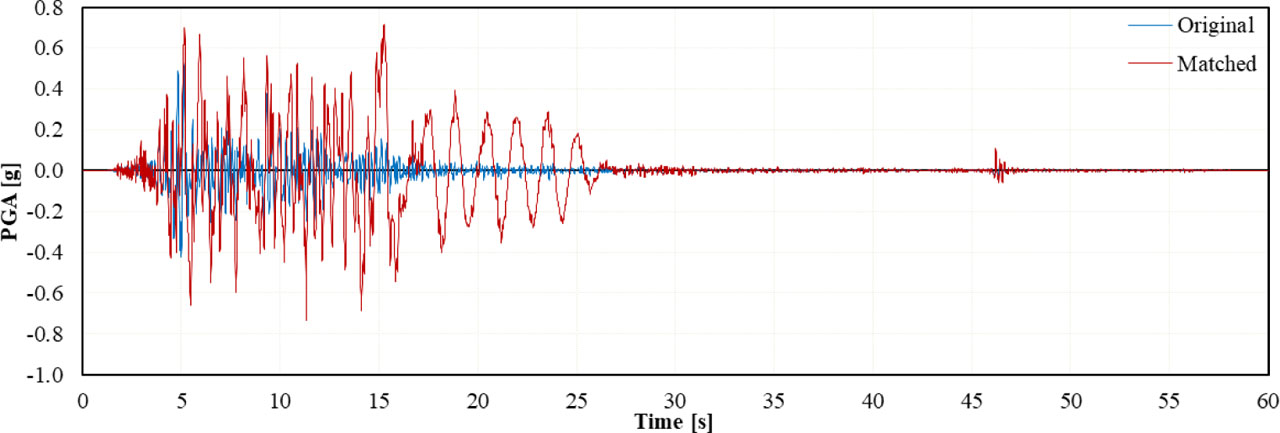
Figure 9:
Comparison of time history curves with Sagaing City and Big Bear Earthquake
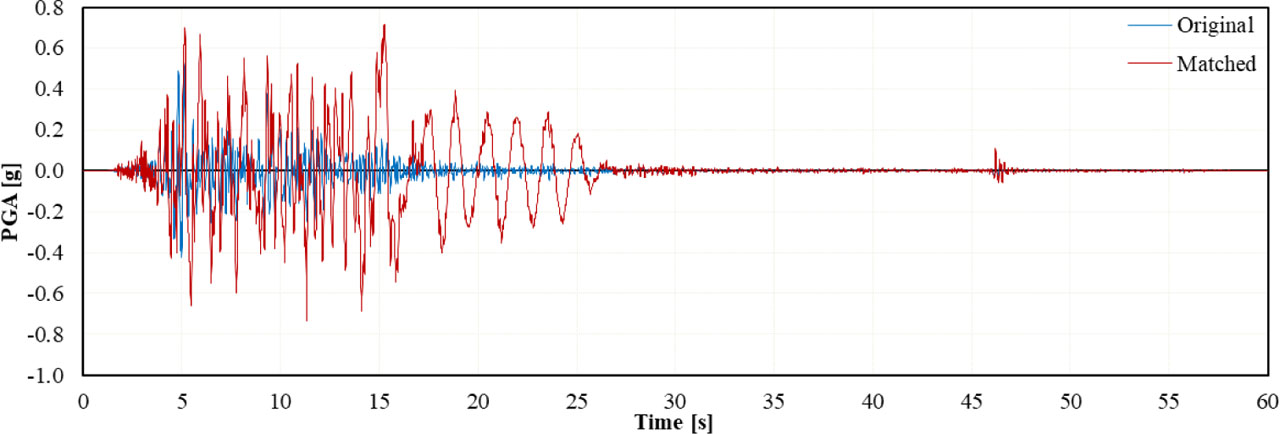
Figure 10:
Comparison of time history curves with Sagaing City and Northridge-01 Earthquake
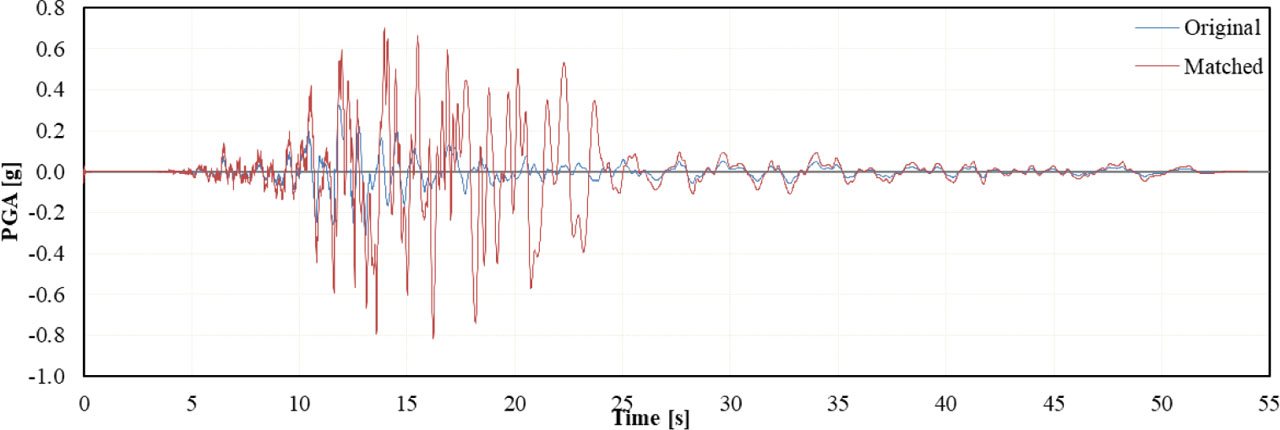
Figure 11:
Comparison of time history curves with Sagaing City and Kobe Earthquake
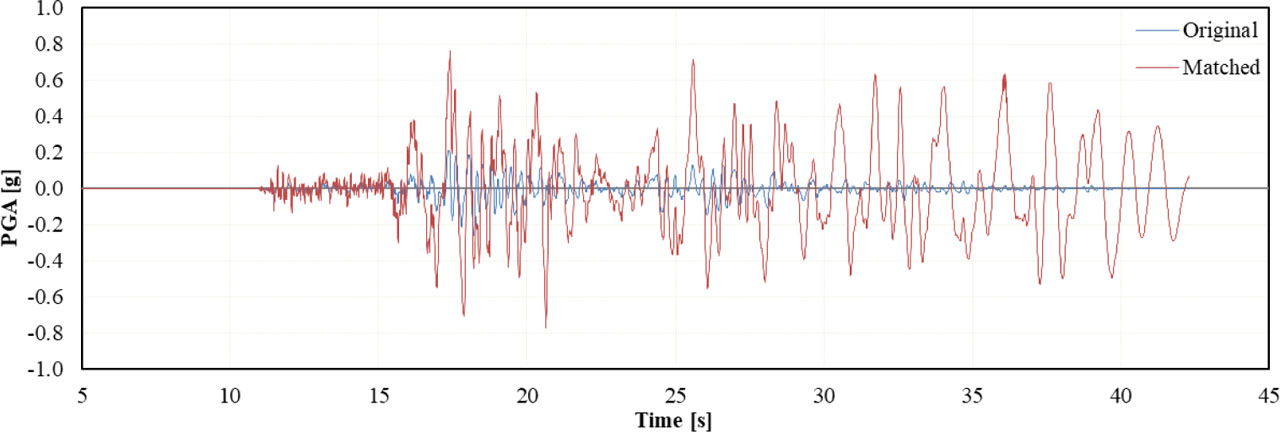
Figure 12:
Comparison of time history curves with Sagaing City and Duzce Turkey Earthquake
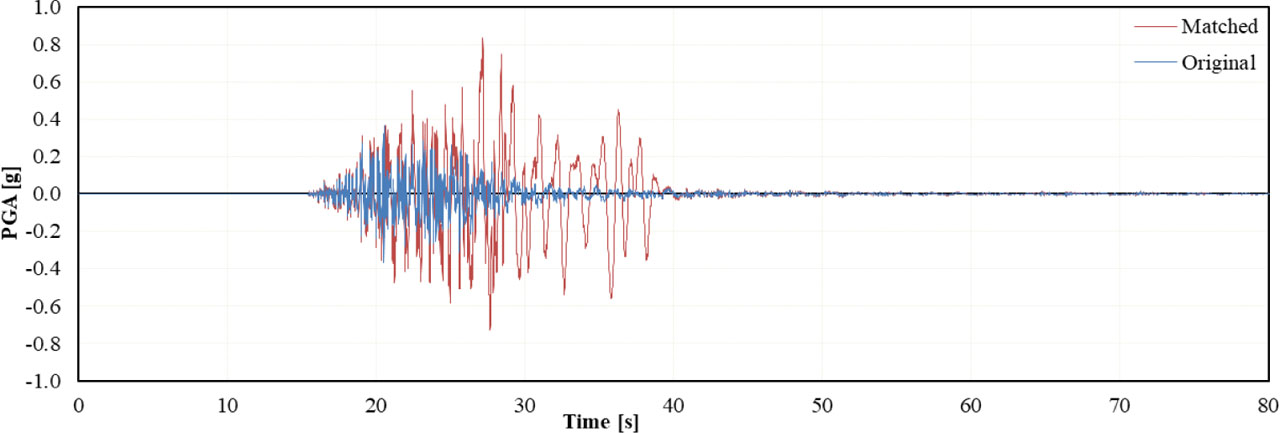
Figure 13:
Comparison of time history curves with Sagaing City and Iwate Japan Earthquake
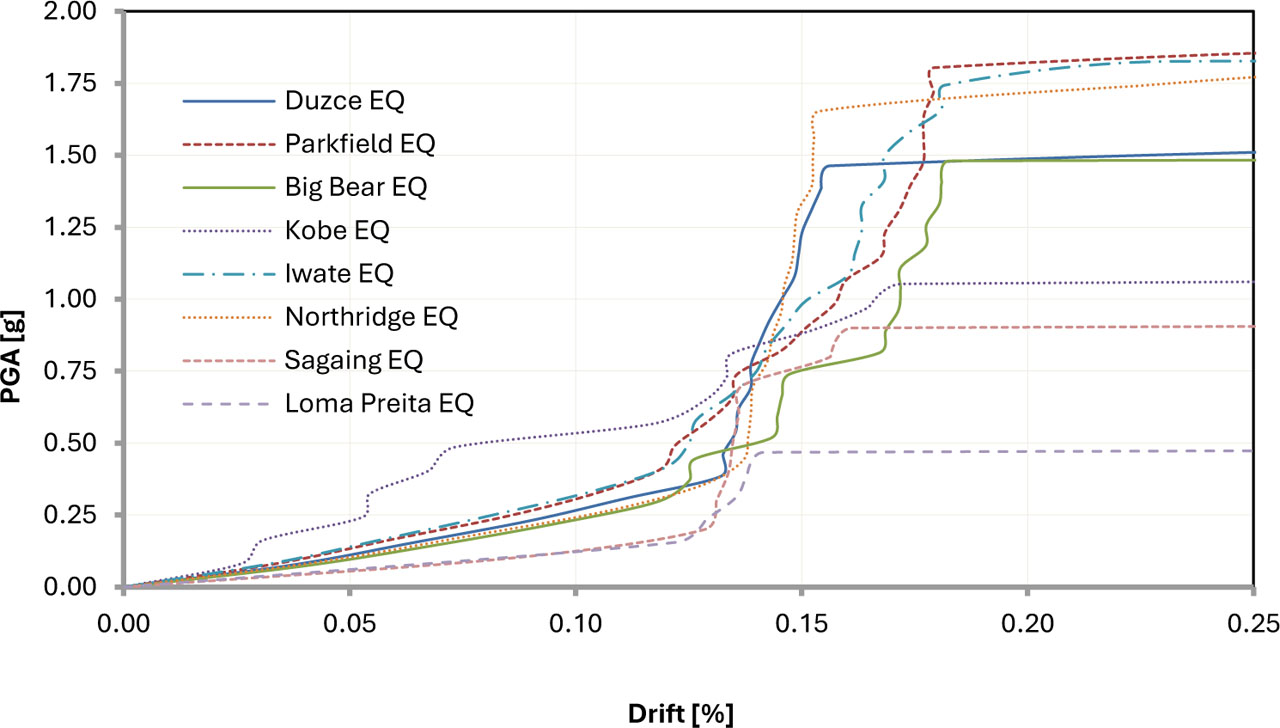
Figure 14:
Incremental dynamic analysis curves of Pier 1
Table 3:
Displacement results from pushover analysis
| Pier | Base Shear [kN] at | Target displacement [m] at | Maximum displacement [m] at | Yield displacement [m] at | Maximum Drift [%] | |||||
|---|---|---|---|---|---|---|---|---|---|---|
| x-direction | y-direction | x-direction | y-direction | x-axis | y-axis | x-axis | y-axis | x-axis | y-axis | |
| Pier1 | 350280.41 | 0.5 | 0.2553 | 0.525 | 0.135 | 0.199 | 0.87 | 1.79 | ||
| 301893.19 | 0.35 | 0.2526 | 0.352 | 0.135 | 0.188 | 0.86 | 0.46 | |||
| Pier2 | 350287.22 | 0.55 | 0.2553 | 0.525 | 0.135 | 0.199 | 0.60 | 1.23 | ||
| 301889.28 | 0.38 | 0.2526 | 0.352 | 0.135 | 0.188 | 0.57 | 0.82 | |||
| Pier3 | 350287.22 | 0.55 | 0.2553 | 0.525 | 0.135 | 0.199 | 0.60 | 1.23 | ||
| 301889.28 | 0.38 | 0.2526 | 0.352 | 0.135 | 0.188 | 0.57 | 0.82 | |||
| Pier4 | 354232.46 | 0.6 | 0.2553 | 0.525 | 0.135 | 0.199 | 0.55 | 1.13 | ||
| 301888.15 | 0.45 | 0.2526 | 0.352 | 0.135 | 0.188 | 0.54 | 0.70 | |||
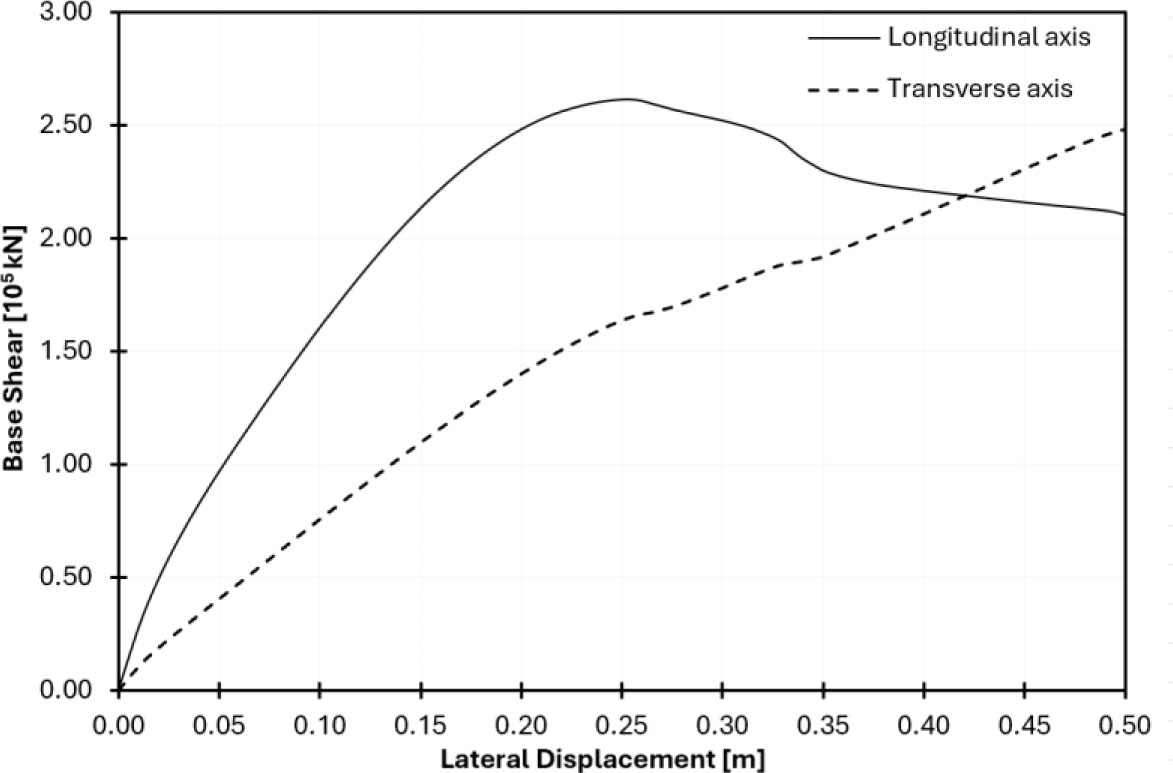
Figure 15:
Longitudinal direction capacity curve
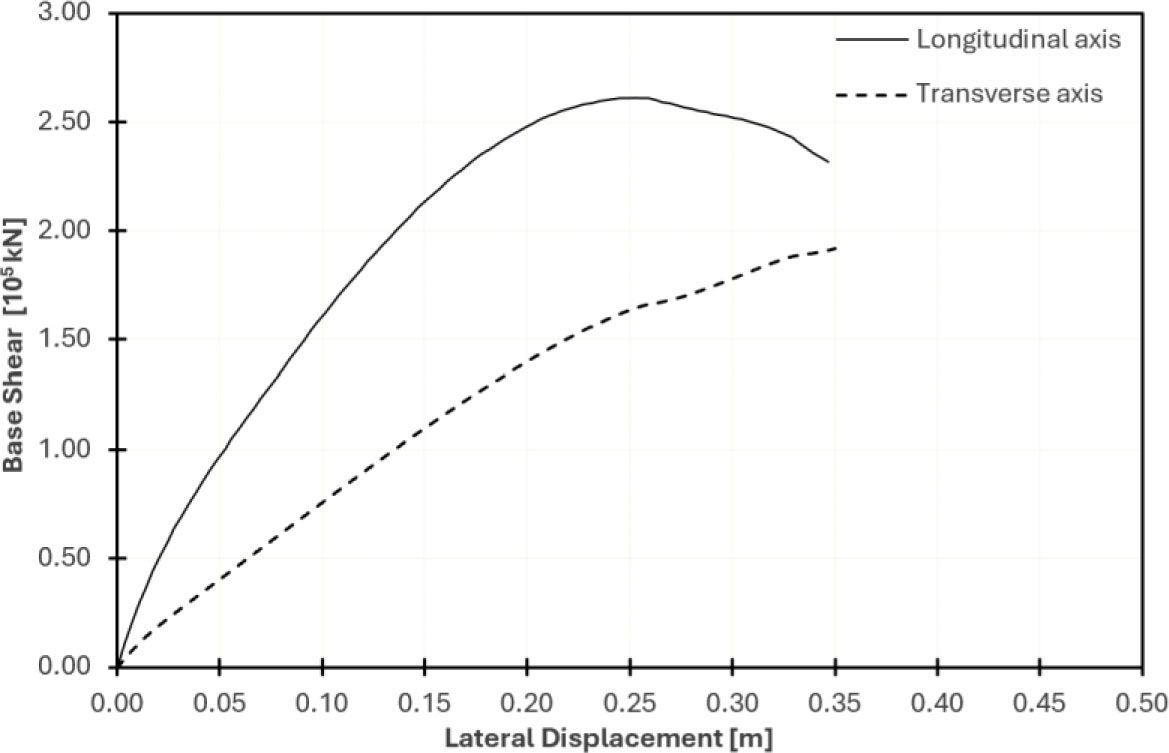
Figure 16:
Transverse direction capacity curve