Have a personal or library account? Click to login
Investigations of stress and strain state of aluminum alloys during a hot extrusion and patterns of structure and feature formation Cover

Investigations of stress and strain state of aluminum alloys during a hot extrusion and patterns of structure and feature formation

Open Access
|Feb 2024

Figures & Tables

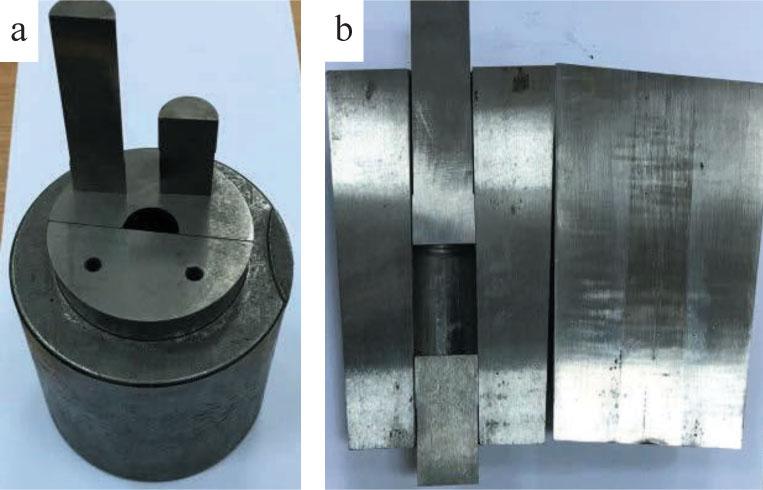
FIGURE 1.

The mold for preparing samples: a – assembled; b – cross-sectionSource: own elaboration.

FIGURE 2.

A schematic of sample creation: 1 – die, 2 – movable punch, 3 – fixed punch, 4 – metal powderSource: own elaboration.

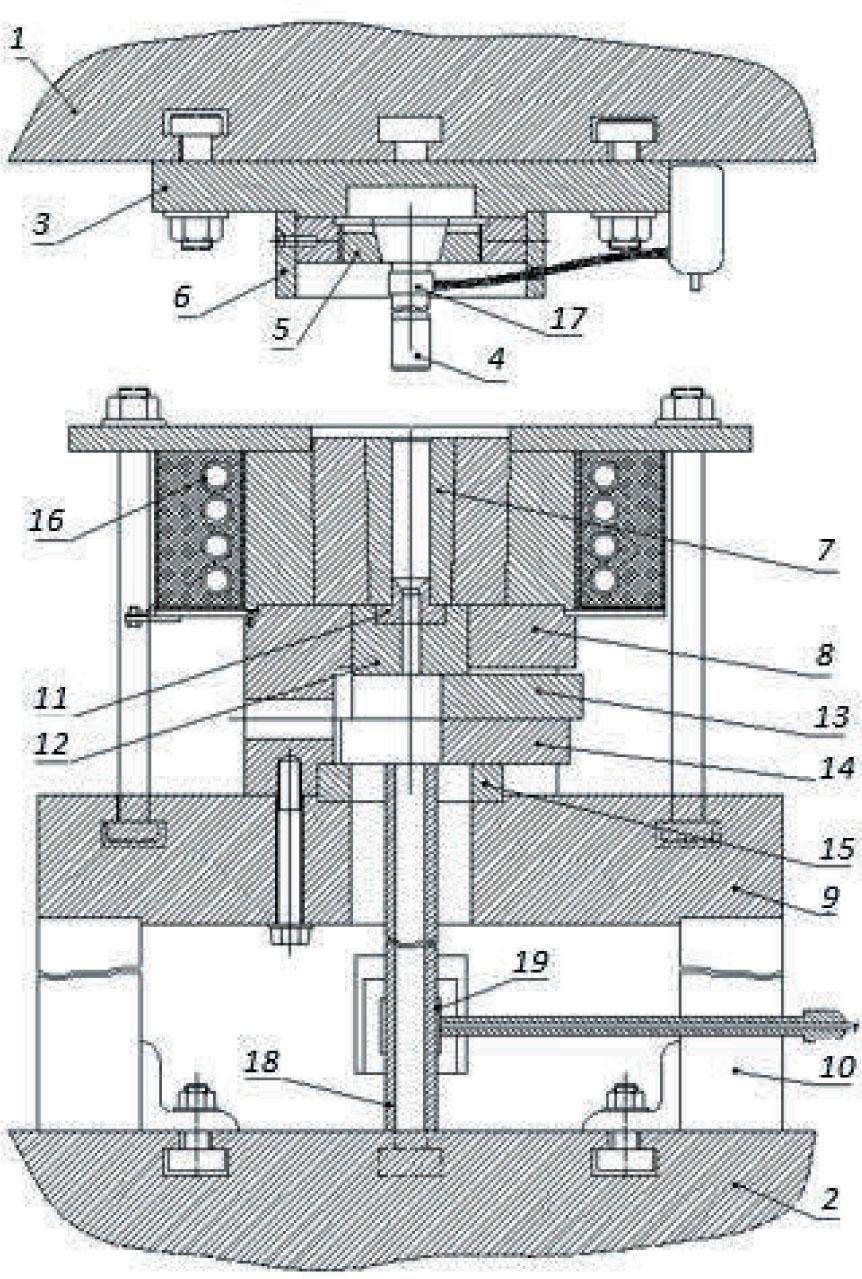
FIGURE 3.

A schematic of the extruder: 1, 2 – upper and lower press plates, 3 – upper extruder plate, 4 – punch, 5 – nut, 6 – stop, 7 – container, 8 – container plate, 9 – plate, 10 – protecting pipe, 11 – die, 12 – clamp, 13 – upper wedge, 14 – lower wedge, 15 – ring, 16 – electric heater, 17 – strain gauge, 18 – force gauge, 19 – strain gaugeSource: own elaboration.

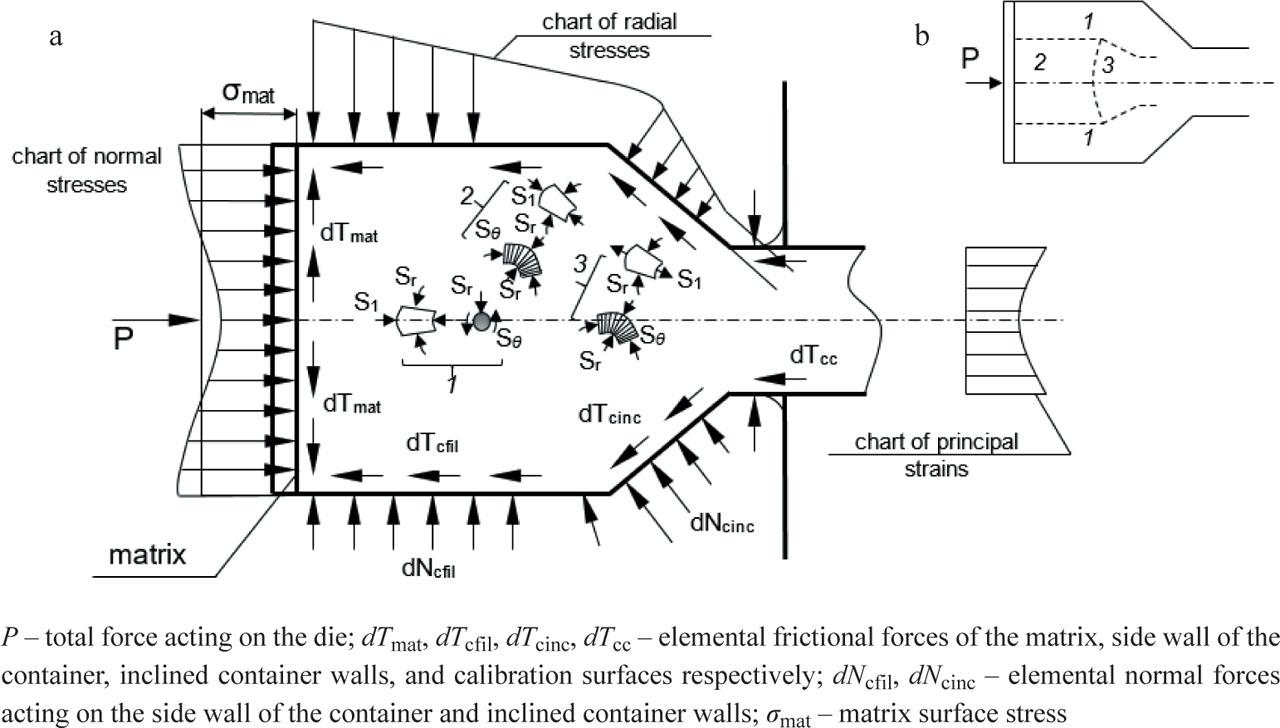
FIGURE 4.

Diagram of forces and stresses acting on the sample during extrusion (in reality, the conical part has rounded walls)Source: own elaboration.

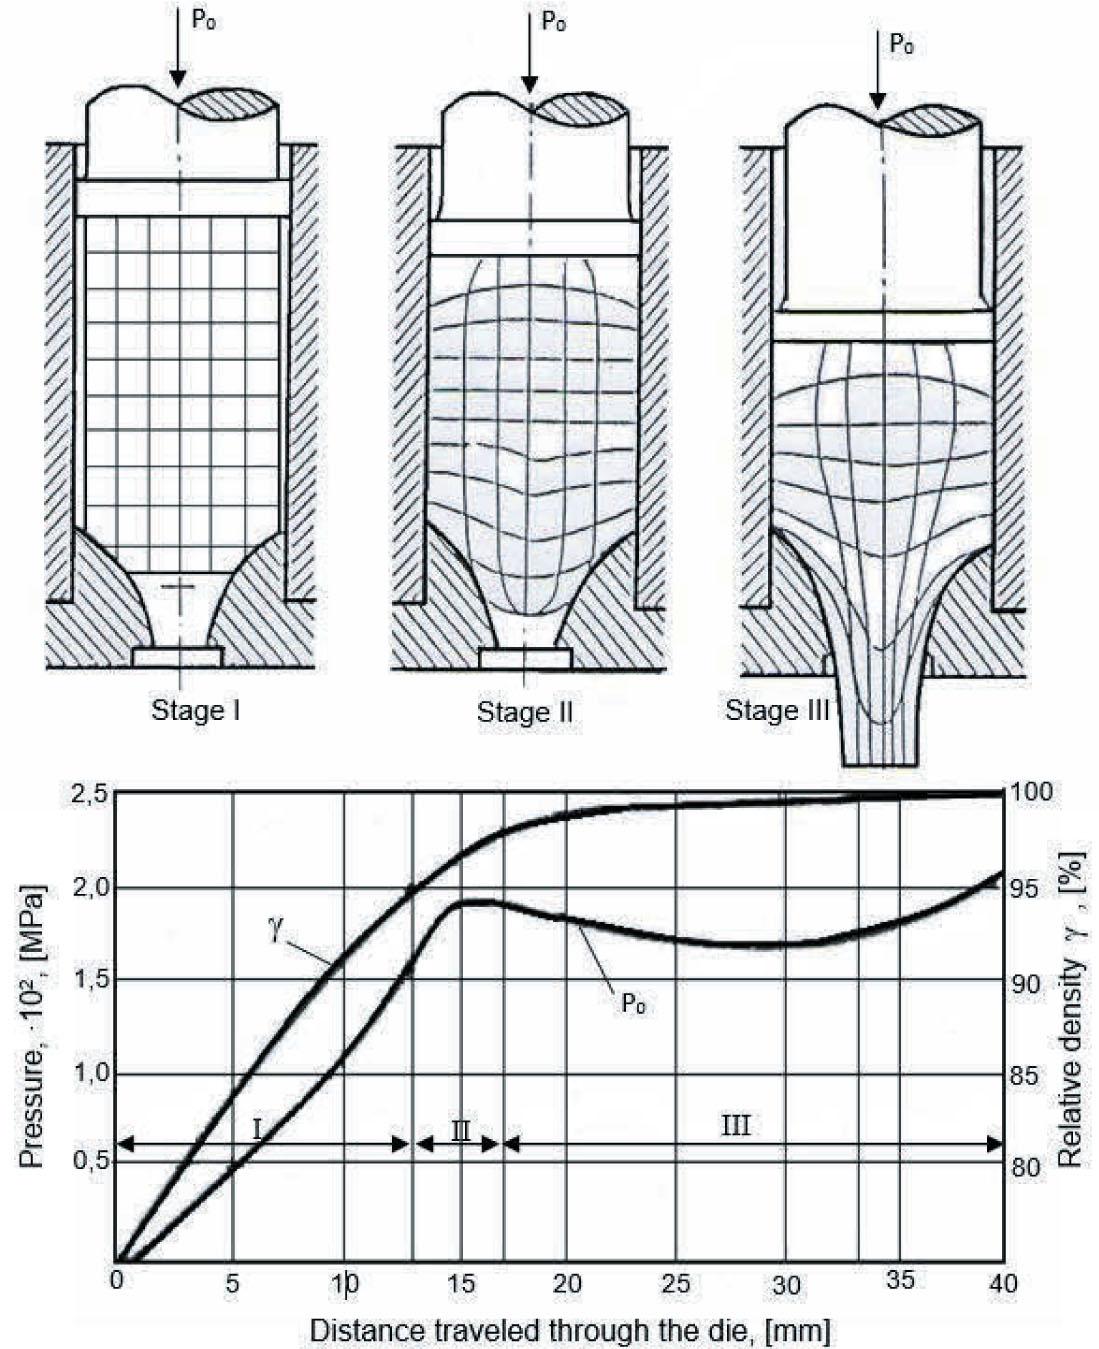
FIGURE 5.

Changes in die pressure and relative density depending on the stage (I, II, III) of the hot extrusion process (Po – the total force acting on the sample during extrusion)Source: own elaboration.

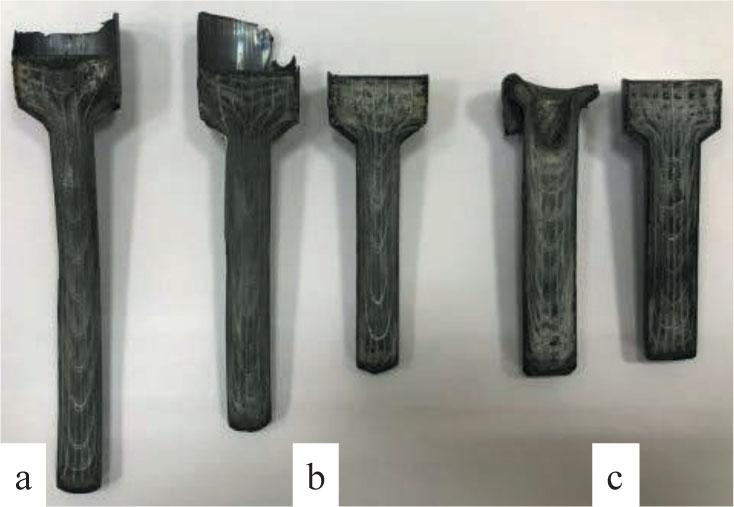
FIGURE 6.

Image of samples with a coordinate grid applied after the hot extrusion process: a – for a sample with a final diameter of 10 mm; b – for samples with a final diameter of 12 mm; c – for samples with a final diameter of 14 mmSource: own elaboration.

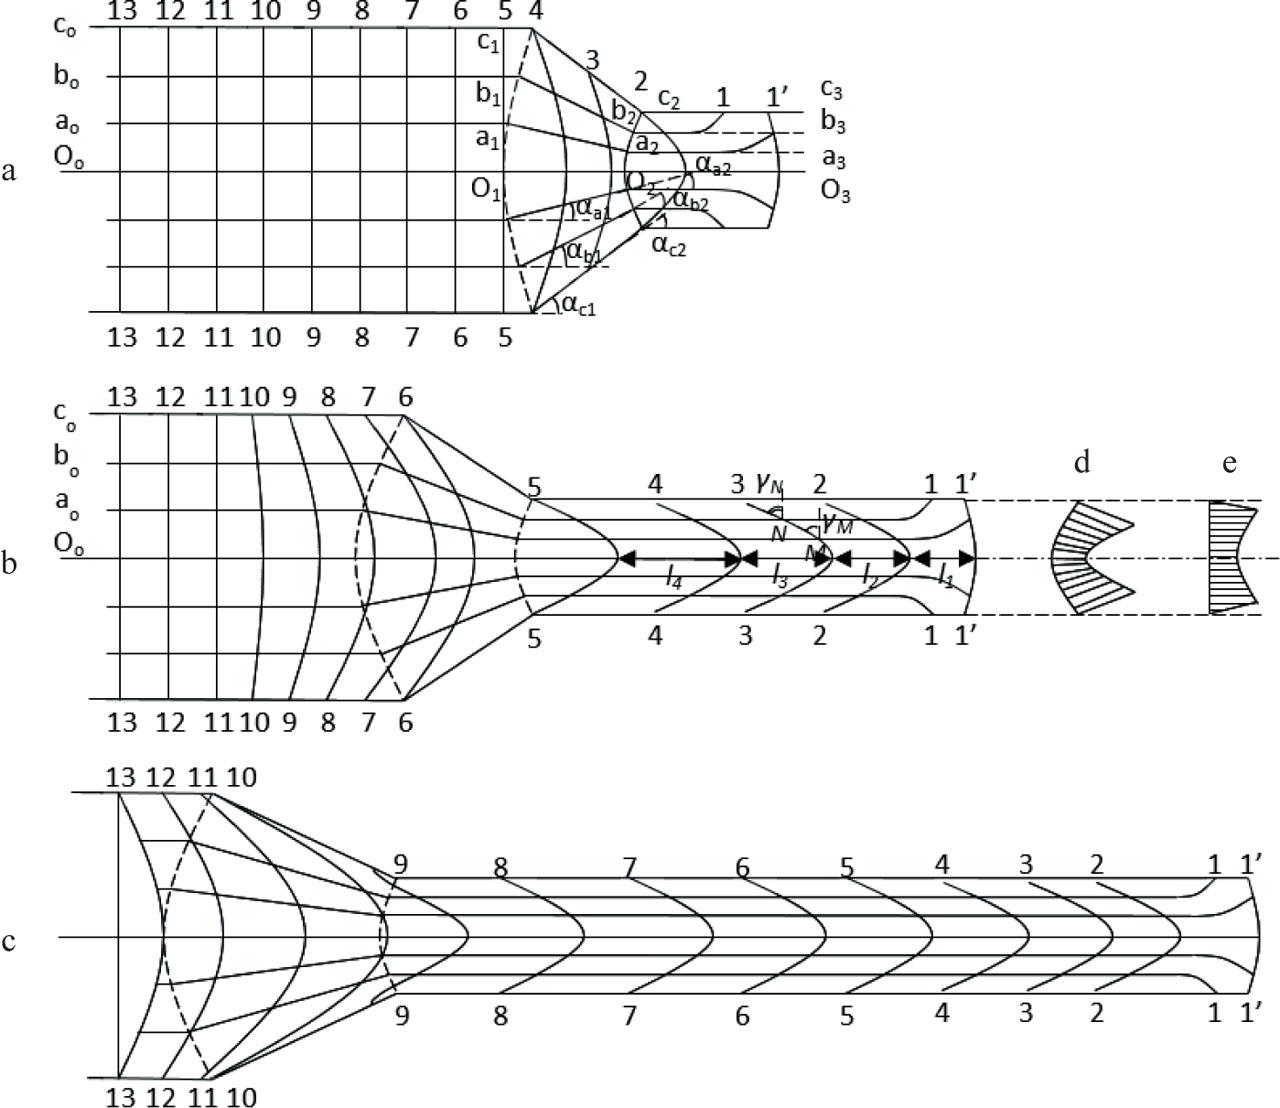
FIGURE 7.

General schematic of the coordinate grid and stress state of the metal sample subjected to hot extrusion: a – in the initial phase of the process; b – in the main phase of the process; c – in the final phase of the process; d – deformation chart in the plastic deformation zone at the end of the conical part; e – deformation chart of the sample at the beginning of the conical partSource: own elaboration.

FIGURE 8.

Diagram of forces acting on the sample, strain chart, and types of stress states during hot extrusion: a – under classical conditions; b – in the case of a sudden decrease in strength in the surface layerSource: own elaboration.

FIGURE 9.

Microstructure of the internal layers of the duraluminum string (magnification ×100): a – beginning of the string; b – middle of the string; c – end of the stringSource: own elaboration.

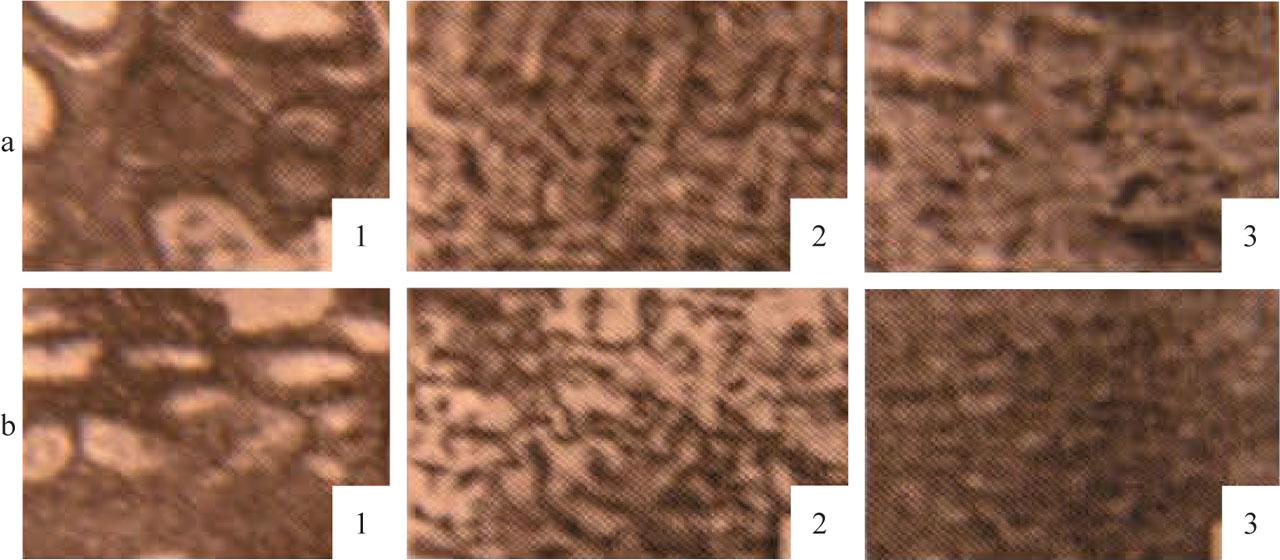
FIGURE 10.

Microstructure of different sections of the duraluminum string extruded without grease (magnification ×250): a – surface of the rod; b – middle of the rod (1 – beginning of the string; 2 – middle of the string; 3 – end of the string)Source: own elaboration.

The composition and physical properties of the used aluminum powder

Al content [%]Al2O3 content [%]Fe content [%]Humidity [%]Bulk density [g·cm−3]
93.860.20.10.9

The composition and physical properties of the used copper powder

Cu content [%]Fe content [%]Pb content [%]As content [%]Sb content [%]Bi content [%]Bulk density [g·cm−3]
99.50.020.050.0050.010.302.5
DOI: https://doi.org/10.22630/srees.5948 | Journal eISSN: 2543-7496 | Journal ISSN: 1732-9353
Language: English
Page range: 3 - 16
Submitted on: Nov 30, 2023
Accepted on: Jan 2, 2024
Published on: Feb 1, 2024
Published by: Warsaw University of Life Sciences - SGGW Press
In partnership with: Paradigm Publishing Services

© 2024 Suren G. Aghbalyan, Vazgen Bagdasaryan, Gayane A. Vasilyan, Rafał Wyczółkowski, published by Warsaw University of Life Sciences - SGGW Press
This work is licensed under the Creative Commons Attribution-NonCommercial 4.0 License.