
1. Introduction
This exercise teaches concepts in the area of public/private key cryptography, also known as asymmetric cryptography. This form of cryptography is fundamental to the security of the modern Internet and is used for the majority of data ex-changed. Transport layer security (TLS) uses it to establish a secure connection between computers and underlies HTTPS the protocol used to exchange web pages securely (over 95% of modern web connections are over HTTPS). Internet security must account for the possibility that a third party, sometimes known as a “man-in-the-middle,” exists on the path that data is sent and can read and/or change every piece of that data. Public/private key cryptography can provide two guarantees for data. Firstly, the data is encrypted: the real message cannot be read by a third party who can read all the data exchanged. Secondly, the data is signed: it can be verified the message originates with the claimed sender and has not been altered by an intermediary. These two basic guarantees cannot be given by symmetric cryptography unless the communicating users preshare a key by some other secure means.
Diffie and Hellman first introduced public/private key cryptography for encoding/decoding in Diffie and Hell-man (1976) and signing/verifying was introduced in Rivest et al. (1978)1. In symmetric cryptography users share a private key that must be kept secret and is used to encode and decode a message. In asymmetric cryptography a pair of associated keys are used, one public and one private. The public key can be shared freely as long as the private key remains secure. If a message is encoded with the public key then only the matching private key can decode it. If a message is signed with a private key then the matching public key can be used to verify that the signature did use the matched private key and the signed message is unaltered. In practice a signing operation uses a message hash (a shortened version of the entire message) for efficiency (to avoid the computational expense of a complex operation on a long message). A final problem is key distribution: how can a person be sure they have the correct public key for the entity they communicate with? This is solved with public key infrastructure (a system of signing chains and trusted keys) proposed in Kohnfelder (1978) and first made concrete in a protocol known as X.509 (International Telecommunications Union 1988).
The exercises here were developed as part of a module called “Information System Management.” Originally the material was taught with a traditional lecture followed with a traditional tutorial using exam style questions and answers. In all the material I use the usual conventions in this field: honest actors (Alice and Bob) wishing to exchange a message; and a dishonest actor (Eve) who is a “man-in-the-middle” (able to intercept and alter messages) and wishes to disrupt that2. In exam conditions, after lectures and a tutorial, students could not reliably answer questions such as “Which key could Bob use to encrypt a message to Alice?” (Alice’s public key) or “Which key could Alice use to sign a message and prove it is from her?” (Alice’s private key). I replaced the tutorial with a short classroom activity (approximately 30–40 minutes) that would follow the lecture and fix in the students mind the differences between public and private keys and the operations of signing a message (verifying a message was sent by a particular actor) and encrypting a message (ensuring a message can only be read by the intended recipient).
2. Goals
The key take home things the student should learn are:
Public/private key pairs: two keys that operate together. The public key can be revealed to anyone, the private key must be kept secret (private).
Non-repudiability and the operation of signing: operating on a message to prove that it is unmodified and must have come from a given sender.
Confidentiality and the operation of encryption: operating on a message to ensure that it cannot be read except by the intended recipient.
The dangers of a “man-in-the-middle” attack: what is possible if a bad actor intercepts the message (because they are on the delivery path) and can potentially read and alter a message.
A full “man-in-the-middle” attack: where an attacker intercepts a public key and inserts their own.
The need for public key infrastructure (PKI) by showing what happens when an actor tries to distribute their public key.
For a more advanced class: the message hash: a function calculated from a message used in real signing processes rather than the whole message. Signing the hash is equivalent to signing the whole message but more efficient computationally.
These concepts have all been introduced in lectures before the class takes place.
Traditionally this is taught with Alice and Bob trying to send messages and Eve trying to intercept or otherwise interfere with them. The model given in this activity is slightly simplified and nuanced clarifications are given in a later lecture (see Reflections). By the end of the class the students should understand clearly all these roles and operations including combined operations such as a signed and encrypted message. They should be able to answer exam questions such as:
Alice wishes to send a message to Bob such that Bob is sure the message is from Alice and Eve cannot read the message. Which keys must be used? (Alice’s private key and Bob’s public key.)
Bob receives a message signed with Alice’s private key. What can he prove about the message and what key must he use to do this? (He can prove it is from Alice and has not been modified. He should use Alice’s public key.)
The design here is to emphasise the role of the public/private key pair and emphasise that only the owner has access to their private key. The semantics of which keys are used for which operation can be derived from this. Only Alice has Alice’s private key from which it follows that only Alice (using her private key) can decrypt a message encrypted with her public key and only Alice could have signed (with her private key) a message that can be verified using her public key. Proof of ownership of a private key guarantees the identity of the recipient or sender (assuming the key remains secure).
3. Setup
The students will be divided into small teams who must exchange messages. The team size should be such that everyone feels they can participate (in a sufficiently small class it could be individuals). The teams represent Alice, Bob and Eve. Ideally, the team for Eve is physically situated between Alice and Bob so Alice and Bob need to pass messages via Eve. This is a physical representation of the “man-in-the-middle.” Props made from large pieces of paper are used to represent information in the system. These must be large enough that they can be seen clearly from the front of the class. However, they do not contain a lot of text so this is not a difficult requirement.
The following paper props are distributed to the teams:
Large pieces of paper (I used two A3 sheets sellotaped together) representing public and private keys for Alice, Bob and Eve.
Messages (half the size of the above, I used a single A3 sheet) representing secret and public messages that the teams wish to share.
In the advanced version of this only: Message hashes (smaller than messages) representing a function calculated from message. They are physically smaller, a physical representation of the fact they represent less data.
The keys have fragments from real public/private keys to add an authentic look (—–BEGIN RSA PRIVATE KEY—). The most important thing is they are clearly labelled with whose key it is and whether it is public or private eg “Alice’s Public Key” “Bob’s Private Key” “Eve’s Private Key.” For each group there should be one copy of the private key and three copies of the public key (as the public keys are available to everyone) and a variety of secret and public messages. For the messages I chose to emphasise messages that were public and private by including “Top secret” printed large, bold and red as part of the private messages. I further emphasised this by making the public messages very positive things “I am learning a lot today” and making the secret messages less positive “I hope class is over soon, I am tired.” obviously this could be tuned to the individual lecturer’s style but I did get genuine laughs from the negative secrets.
The keys are folded in half so that messages or hashes can be contained within them. The idea is that you “encrypt”/“sign” a message by folding it within one or more keys. A folded key can only be opened by the appropriate matching key. This corresponds to a message being “decrypted”/“verified.” It is crucial that the students understand this properly before the exercises begin. An example key is shown in Figure 1 and a slide demonstrating the process in Figure 2. All materials are available on github.
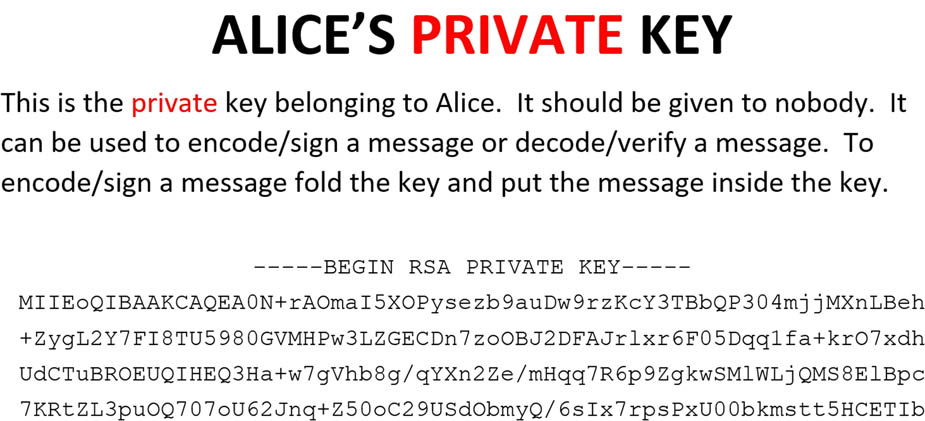
Figure 1
Paper prop of Alice’s private key.
Source: Author’s contribution.
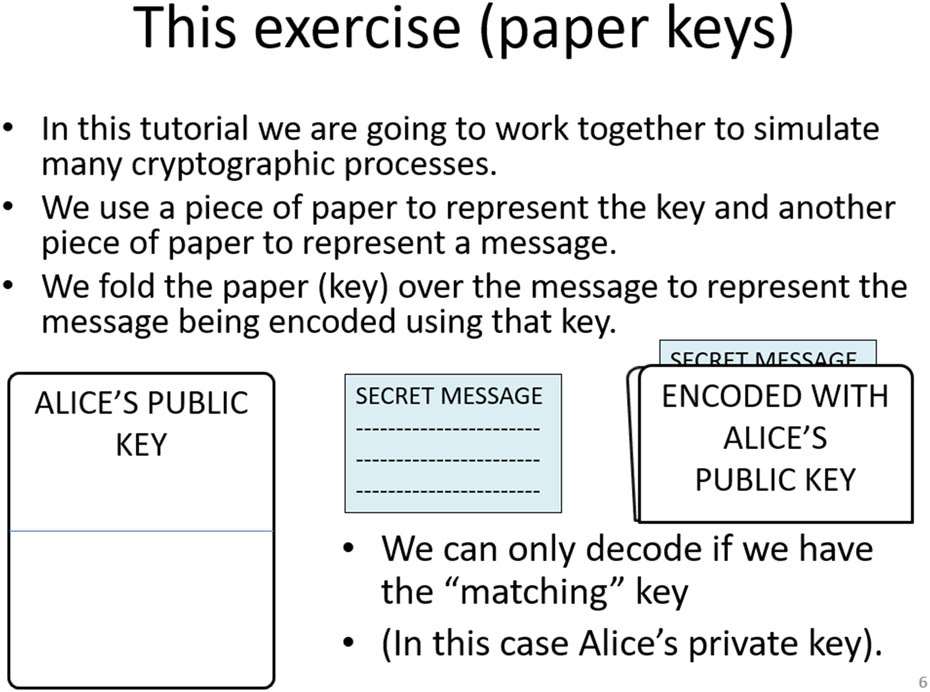
Figure 2
Slide showing the process of encoding shown to the class before exercises begin.
Source: Author’s contribution.
4. Procedure
At the start of the class the operations are clearly demonstrated: for example a message to be sent to Bob is encrypted by folding it within Bob’s public key. Ensure the full class sees what is happening and test understanding with questions like “who has access to Bob’s public key?” “which key can now decrypt it?” and so on. It is critical to emphasise a key can only be unfolded with the matching key in its pair.
As previously mentioned, students are split into small groups representing Alice, Bob and Eve, ideally with Eve physically between Alice and Bob. Larger classes could have several teams for each role. The students each have a copy of their own private key and everyone else’s public key. They have a stock of public and top secret messages that can be sent.
The students are told they can “encrypt”/“sign” by folding a key in half and putting a message inside it. They can “decrypt”/“verify” only if they have the correct key. The rule they are given is “if a message is inside a folded key, you can only remove it from that key if you have the partner key.” It is emphasised that a public key can be shared with anyone with no harm but a private key should never be revealed. The exercises begin once it is clear that all groups have a reasonable understanding of the procedures.
When I ran the class I kept all exercises synchronised with a set of slides projected to indicate what all teams should be doing at any time. I then followed each exercise with a slide containing a model answer for that exercise and any extra points. If a team had successfully completed an exercise before others they can be asked extra questions or to try the exercise with roles changed. The exercises are relatively short (three to five minutes) so no teams were waiting for too long with nothing to do.
If sufficient time remains, exercises can be repeated with roles changed and Eve attempting to send a signed and encrypted message via Bob. This should further cement the students’ understanding of the roles. Wrapup slides then high-light things that will happen in other lessons or followon modules. (My module is not primarily cryptography/security so discussions of exact algorithms used and precise procedures are beyond the scope of this module.)
All material is available online at: https://github.com/richardclegg/public_key_teaching.
5. Lessons
The class proceeds with a series of challenges that increase in difficulty with each requiring more thorough use of the knowledge and principles being taught. Exercise one is for Alice to try to send a secret message to Bob. The Alice team must realise they can encrypt with Bob’s public key and Bob is then the only person who can decrypt. The top secret message should be folded within the public key and handed to Eve. Eve is then asked how they can interfere with this message: they cannot read it but they can, for example, substitute a different message encrypted with Bob’s public key and Bob will believe this comes from Alice.
This substitution motivates the need for signing and in exercise two Bob now should send a public message back to Alice signed with his private key. Eve can read this message but she cannot send a signed message. In the advanced version of this class the group should sign by folding the message hash in the key not the message itself. Emphasise to the students that this is for efficiency (signing an entire message that may be long is not efficient). The groups representing Alice/Bob should be able to answer questions like “Can you be sure this message is from Bob and that it is unaltered?” (non-repudiability) or if Eve substitutes a message “Do you trust that this message is from Bob?”
In exercise three Alice and Bob now try to pass on messages that are both encrypted and signed. Eve cannot now read the message or substitute a message signed by Bob. Eve could simply not pass on the message or substitute an unsigned message. (Emphasise that if Eve never sends on signed messages her position as attacker will be revealed). Make sure the students do send on the message (“Eve you will be caught if you don’t send any messages”).
Finally, in exercise four, I motivate the need for public key infrastructure by showing the problem of key distribution and a full “man-in-the-middle” attack. This exercise looks at what happens if Alice does not have Bob’s public key (confiscate that piece of paper from Alice). We first show Bob sending his public key to Alice via Eve. Bob should realise he can (if he wishes) secure the message with Alice’s public key but it is not useful to sign with his private key as Alice does not (yet) have his public key. However, the Eve player can substitute her own public key (perhaps secured with Alice’s public key). Now Alice will communicate with “Bob” using “Bob’s public key” but in reality is communicating with Eve. Eve can pass on messages so Bob and Alice believe they have a secure channel but do not. The teams together should realise there is no solution to this problem within the systems taught so far and this motivates the need for public key infrastructure to distribute public keys. (In my case this was taught in a follow-up module.)
6. Reflections
Physically situating Eve between Alice and Bob makes the nature of the “man-in-the-middle” vivid in the students’ minds. The fact that public keys were shared with everyone, including the attacker, helped emphasise how they were distributed. Students explaining to each other the details of the (relatively complex) attack where Eve substitutes her own public key helped make concrete how it worked. The Eve team felt pride in their deception (when they got this right) and this made it more memorable. The students greatly enjoyed the activity and, in particular, the adversarial relationship with Eve motivated Bob and Alice to cooperate and Eve to think “outside the box.” The group representing Eve was encouraged by remarks congratulating them for being cunning: “Ah, what an evil plan” if they come up with something ingenious.
This activity slightly conflates signing and encryption (both are done by folding a message within a key) which needs to be clarified later. In practice signing and encryption are not done using the same cryptographic functions. At the end of the session a wrap up slide shows that this will be clarified when Transport Layer Security (TLS) is taught.
The use of a hash for the signing operation is realistic. In practice, this slightly confused the class and I dropped it when I taught this class the second time. The difficulties I saw in exams were at a more basic stage. Students were struggling to answer questions of the nature “Which key should Bob use to digitally sign a message?” and, while they also struggled with the concept of a message hash, I judged this was the less important learning outcome. Hence, I felt this simplification was a price worth paying with the concept being emphasised in lectures not in this exercise.
Where I knew a student would not feel embarrassed, I played a small trick innocently asking “can I quickly borrow your private key?” Usually, the student handed this over. I then publicly handed the private key to an “enemy” team saying “I did tell you not to share your private key.” I was extremely careful to do this only where I knew a student would not feel bad about it. This very dramatically made the point that the private key should not be shared. Subsequent requests to borrow a private key were naturally refused (and I congratulated the students). I then made a request to “borrow” a public key making absolutely clear the point that the public key does not need to be kept secure.
Following the classes, exam marks related to these questions improved hugely. It is not a completely fair comparison as the exercise replaced a tutorial that covered other topics too so more time overall was given to this topic.
Funding information
This work was not supported by funding.
Author contributions
The classes, materials and slides here are all created by the author. I would like to acknowledge useful discussions with colecturer Dr Karen Shoop.
Conflict of interest statement
The author has no competing interests to disclose.